WhatsApp WordPress plugin: How to add live chat button for free
There are multiple ways to add a live chat WhatsApp button to WordPress. In this guide we will show you how you can easily use our WhatsApp WordPress plugin, step by step with images to add chat functionality to your website.
Whatsapp has become one of the world’s most used means to communicate with businesses and to shop online. Since the introduction of new features such as the Business profile, Products Catalog and more, new opportunities were opened for business owners to use WhatsApp to market and sell their products and services online.
Before we started Orgwany we tried all of the WhatsApp integrations, buttons and widgets available online. All of them! We still couldn’t find one that was engaging and invites the website users to start texting with our businesses. And that was how Orgwany was born…
1. Download and install the WhatsApp WordPress plugin
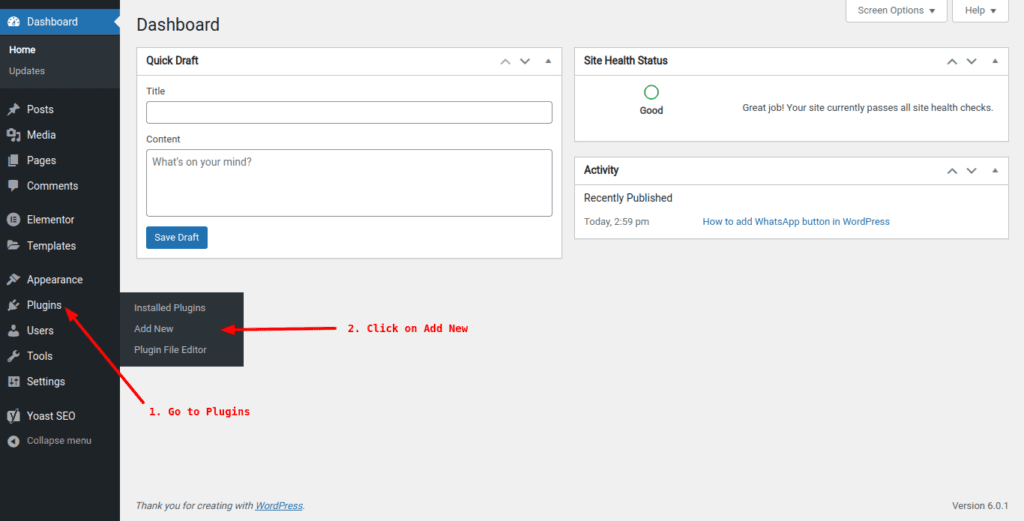
Next, log in to your WordPress website dashboard. With your mouse hover over “Plugins” in the menu on the left and click “Add New”.
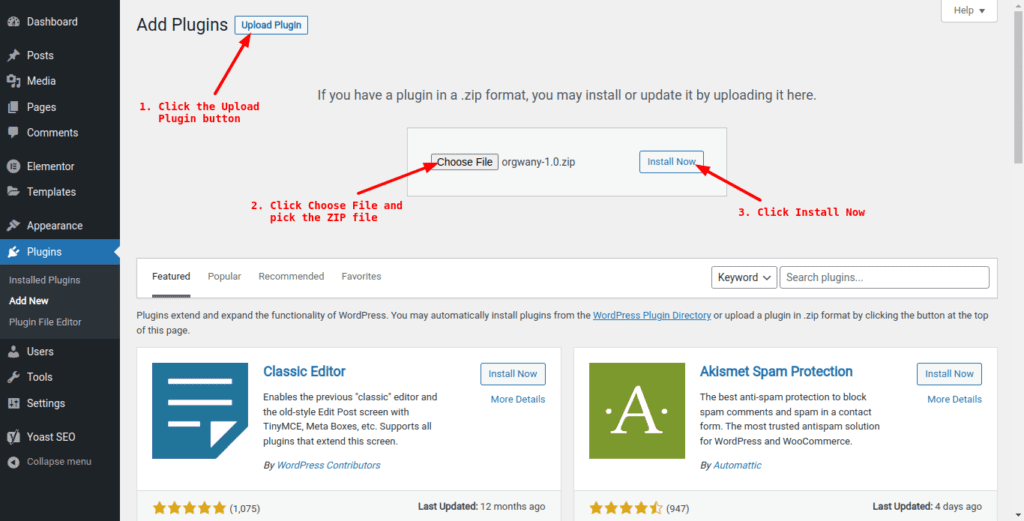
Then, next to the page title click “Upload Plugin”. You will be shown a box where you can choose a file to upload. Click “Choose File” then choose the plugin ZIP file that you have just downloaded and click “Install Now”.
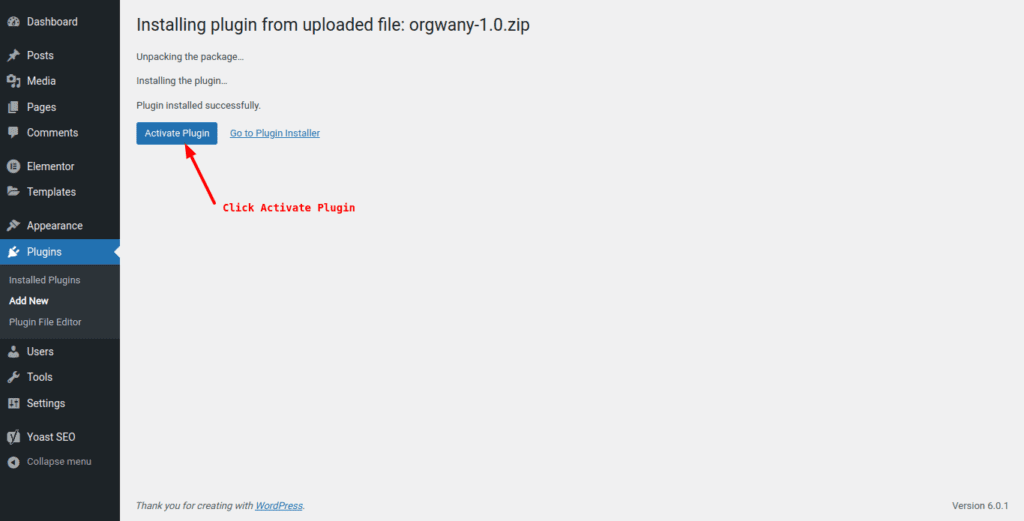
When the installation is done, click “Activate Plugin” to active it.
That was easy, wasn’t it ? Now let’s create a free account and customize your WhatsApp button and widget before so it would match your business identity.
2. Create a free account and customize your widget
Let’s go to the Create new account page to create your free account. The new account for is simple and takes exactly 1 minute.
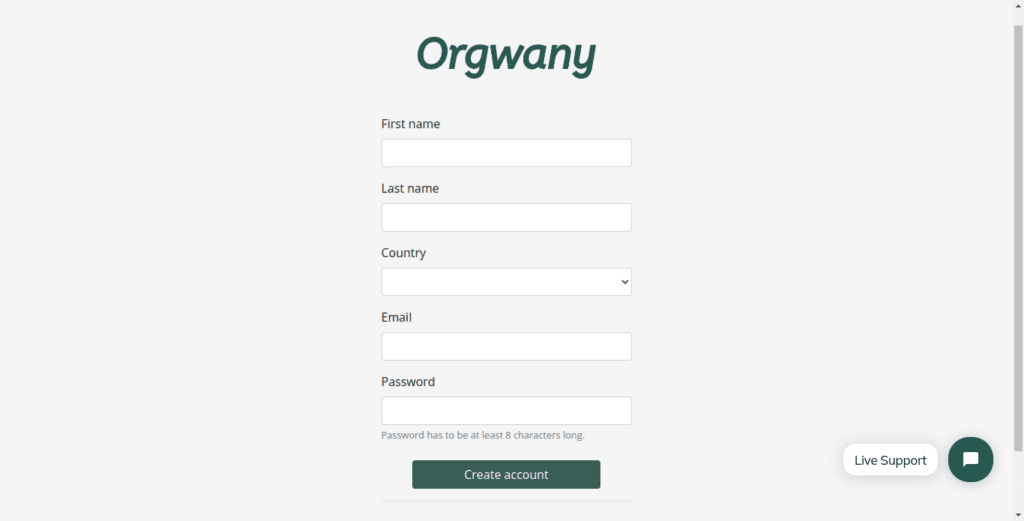
After creating your account you will be automatically signed in to your Orgwany account dashboard.
Click on the “New Widget” button to create your first customizable WhatsApp button and widget.

Fill in the information of required in the form. Remember to add the WhatsApp number with your country code. This will be the number that your customers will contact you on via WhatsApp. When you’re done, click “Create widget”.
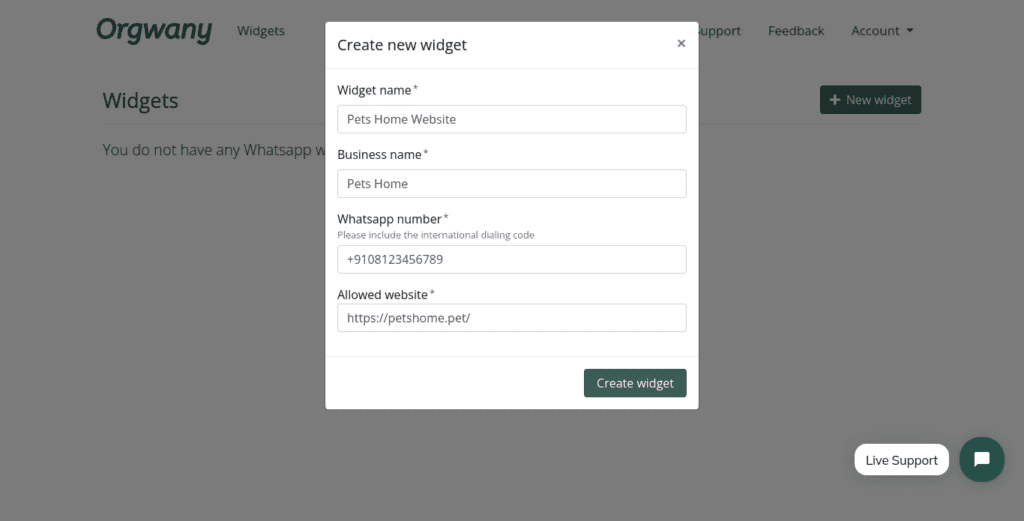
You have just created your WhatsApp widget and you should now see the “Integration” tab in the widget settings. We don’t need that now since we are using the WordPress plugin.
Go directly to “Customize” and start customizing your WhatsApp widget. Be sure to enter an attractive automated message to show to your website visitors and to invite them to contact you. When you’re done, click “Save”.
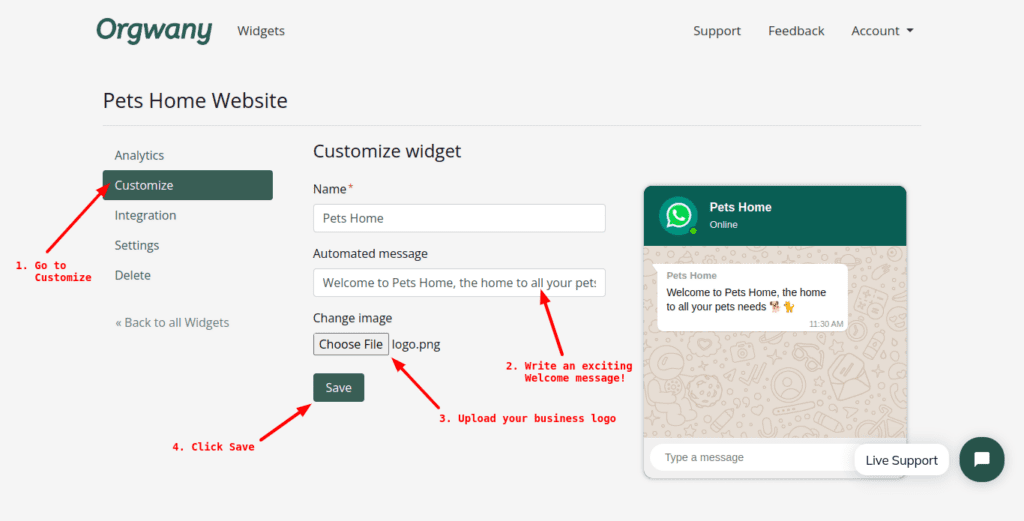
If you get a success message then you’re all done! Now the last step is to activate your plugin integration in WordPress. Head over to the next and last step.
3. Activate WhatsApp plugin with your integration key
Let’s head back to the “Integration” tab and choose the WordPress Plugin method. At the bottom of the page you will find your widget integration key. Copy it and go to the next step.
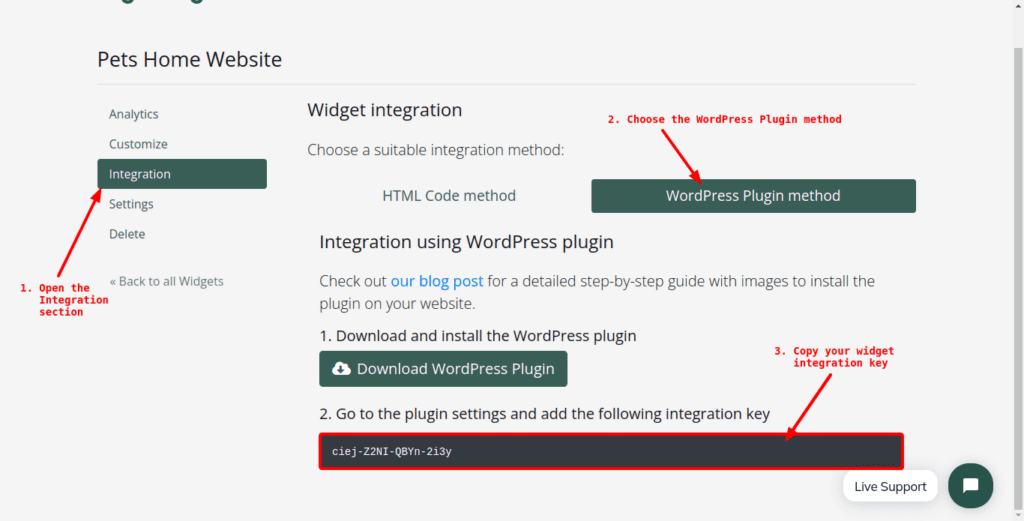
Go back to your WordPress dashboard and under the “Settings” menu click “Orgwany”.
You will find an input field to enter your widget integration key. Paste the code that you have just copied and click “Save changes”.
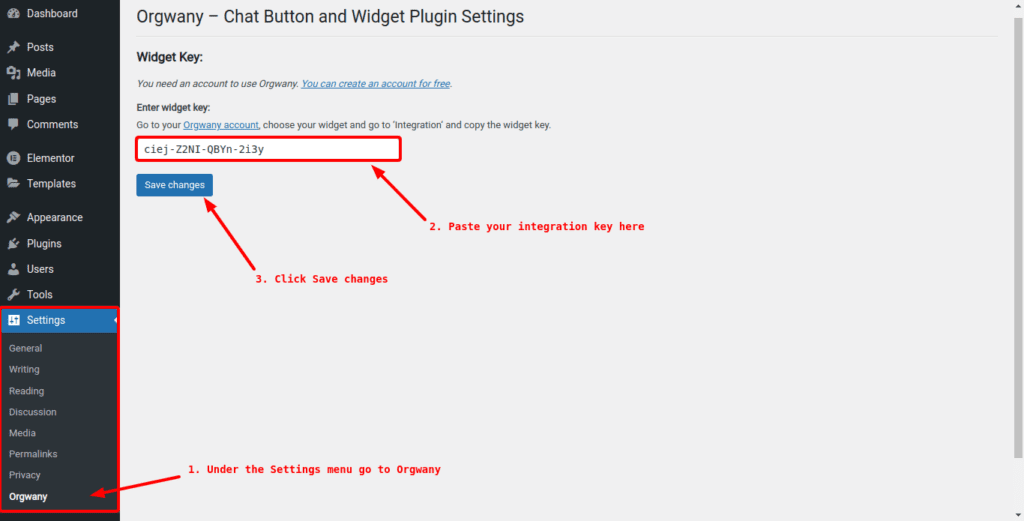
After you click save you should get a success message “Widget key updated”. You can now go to your website homepage and try the WhatsApp chat button and widget.

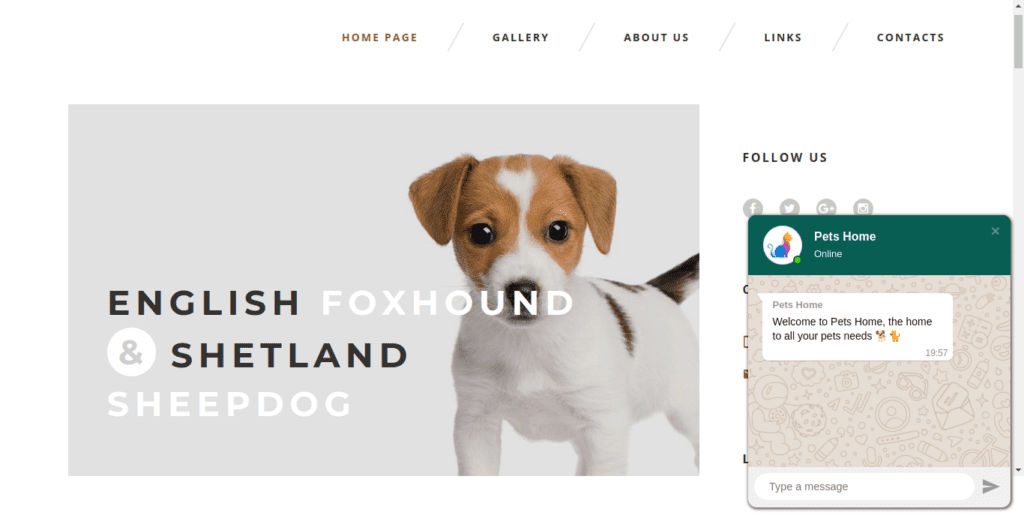
Congratulations! Your have successfully installed WhatsApp chat button on your WordPress website.
We would really appreciate your feedback and suggestions about the widget and the integration. We are working on improving Orgwany and we listen to our users openly. Also let us know if you think this guide can be further improved.
Discover more

Why Every WordPress Website Should Have a WhatsApp Chat Button
WhatsApp is a game changer for your business. Here are some benefits of adding WhatsApp chat button to your website.
Orgwany
The Best Whatsapp chat widget for websites. Engage with customers, generate more leads and increase sales using Whatsapp.
Sitemap
